There’s nothing quite like the comforting aroma of freshly brewed coffee in your home. But what if you could enjoy that warm, inviting scent anytime, without brewing a cup?
Making your own coffee scented candle is a fun, creative way to bring that cozy coffeehouse feeling into your space.
The best part? It’s easier than you think — no special skills are needed, just a few ingredients, some simple tools, and a little patience.
Not only do homemade coffee candles fill your home with a delightful aroma, but they also make fantastic gifts for friends, family, or even as a little treat for yourself.
Unlike store-bought candles, DIY coffee candles allow you to control fragrance intensity, wax type, and container style, giving your candle a personal touch.
Plus, making candles can be a relaxing, mindful activity that feels satisfying from start to finish.
In this guide, you’ll learn step-by-step how to make a coffee scented candle, from choosing the right wax to adding the perfect coffee aroma.
I’ll also share pro tips to make your candle burn evenly and smell amazing, so your creation is not only pretty but functional too.
What You’ll Need
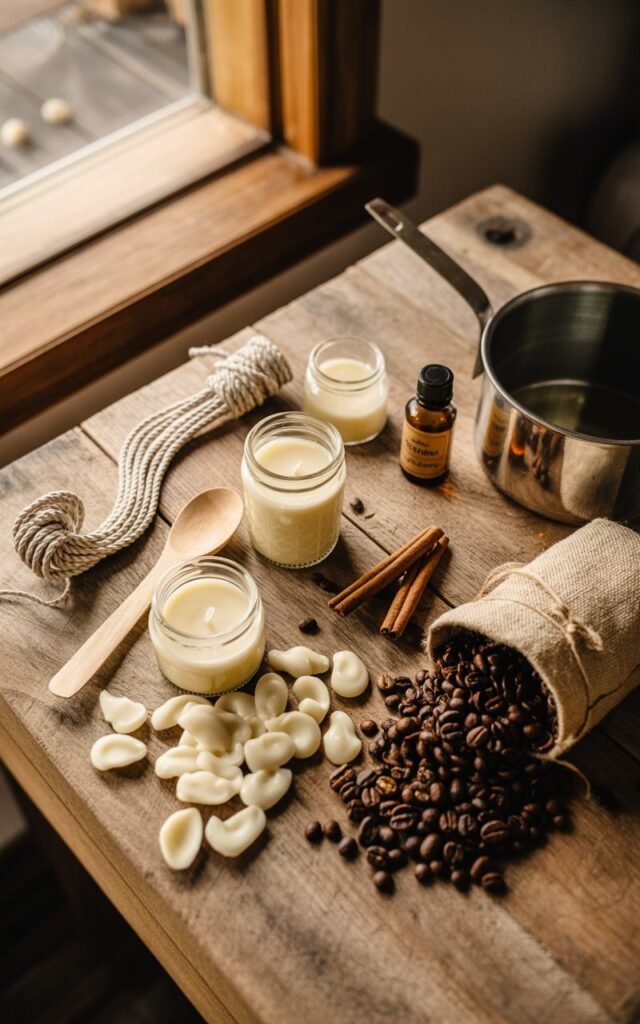
Before we start, gather these essentials to make the process smooth and enjoyable:
- Wax: Soy wax is recommended for beginners because it’s easy to work with, eco-friendly, and burns cleanly. You can also use beeswax or paraffin wax if preferred.
- Wick: Cotton or wood wicks work well. The size of the wick depends on the container size.
- Container: Glass jars, small mugs, or tin containers make great vessels for coffee candles. Make sure they’re heatproof.
- Coffee fragrance oil or ground coffee: Fragrance oil ensures a consistent coffee aroma, while real coffee grounds add a subtle, natural scent.
- Double boiler or microwave-safe container: For melting the wax safely.
- Thermometer: Optional but helpful to check wax temperature.
- Stirring utensil: A wooden spoon or disposable stirrer works best.
- Glue or wick sticker: To secure the wick at the bottom of the container.
1. Prepare Your Workspace and Gather Supplies

Before you even touch the wax, setting up a clean and organized workspace is essential for a smooth candle-making process.
A clutter-free, heat-resistant surface ensures safety and prevents accidental spills. Cover your table with a silicone mat, parchment paper, or newspaper to catch stray wax.
What You’ll Need:
- Soy wax, beeswax, or paraffin wax
- Candle container (glass jar, mug, or tin)
- Wick (cotton or wood)
- Coffee fragrance oil or finely ground coffee
- Double boiler or microwave-safe melting container
- Wooden spoon or disposable stirrer
- Thermometer (optional, but helpful for accuracy)
- Wick stickers or glue
How to Apply It:
Arrange all your ingredients and tools within reach. Make sure you have a dedicated space that’s free from drafts, pets, or children.
This step may seem simple, but having everything organized prevents mistakes and makes the candle-making process more enjoyable.
Pro Tip:
Label your containers if making multiple candles with different scents. This small step avoids confusion and ensures each candle smells exactly how you want it.
2. Secure and Center the Wick
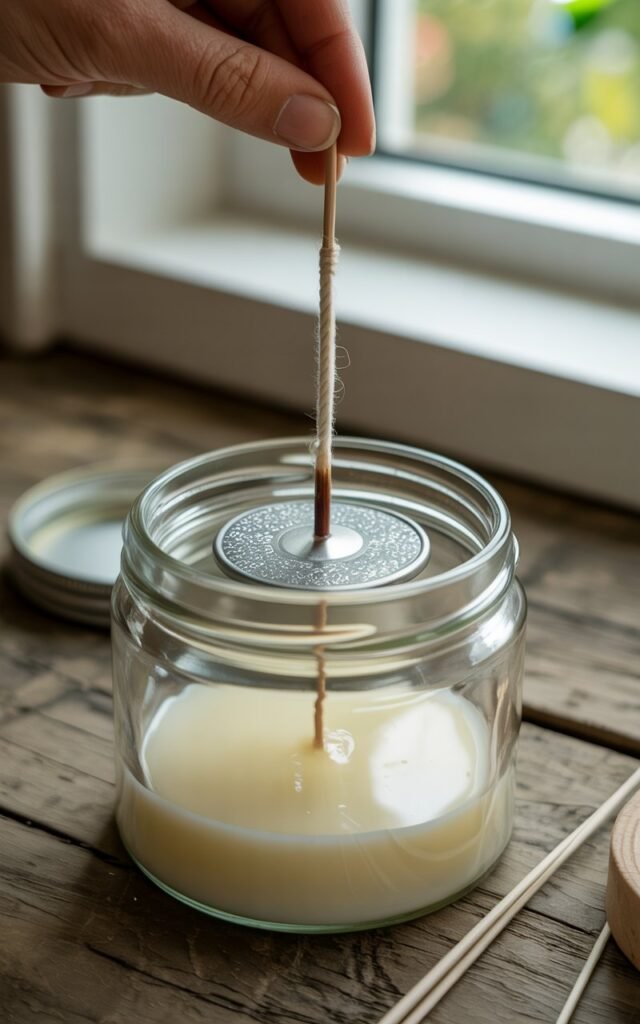
A properly placed wick is crucial for an even burn and maximum fragrance release.
Without this step, your candle could burn unevenly, tunnel in the center, or smoke excessively.
What You’ll Need:
- Wick
- Wick sticker, glue, or a small dab of melted wax
- Pencil or chopstick
How to Apply It:
Stick the wick at the bottom center of your container using a wick sticker or glue. Make sure it’s upright.
Wrap the top of the wick around a pencil or chopstick laid across the container to hold it straight while pouring the wax.
Pro Tip:
Use a wick size appropriate for your container. Too small, and the candle burns slowly and unevenly; too large, and it may produce smoke or melt too much wax too quickly. Always test burn a sample wick size if you’re unsure.
3. Melt the Wax Properly
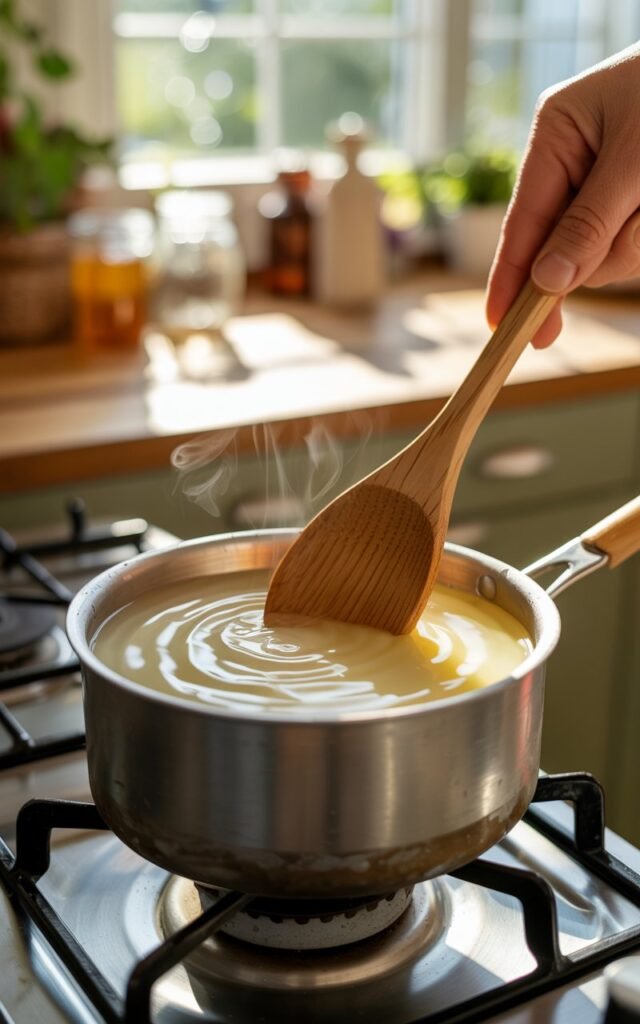
Melting the wax correctly is one of the most important steps. Overheating can alter the fragrance, cause discoloration, or create bubbles, while underheating prevents the wax from fully mixing with the scent.
What You’ll Need:
- Wax
- Double boiler or microwave-safe container
- Thermometer (optional)
How to Apply It:
- Double Boiler Method: Fill a pot with water and place a heat-safe bowl over it. Add your wax and stir occasionally until completely melted.
- Microwave Method: Place wax in a microwave-safe container in 30–60 second increments, stirring between intervals until smooth.
The ideal temperature for adding fragrance is usually around 170–180°F for soy wax. Remove from heat before adding your coffee scent to ensure it fully binds without evaporating.
Pro Tip:
Stir slowly and consistently while melting to prevent air bubbles. For an extra smooth finish, let the melted wax sit for a few minutes before pouring — this slightly cools it and minimizes the risk of cracking as it solidifies.
4. Add the Coffee Scent
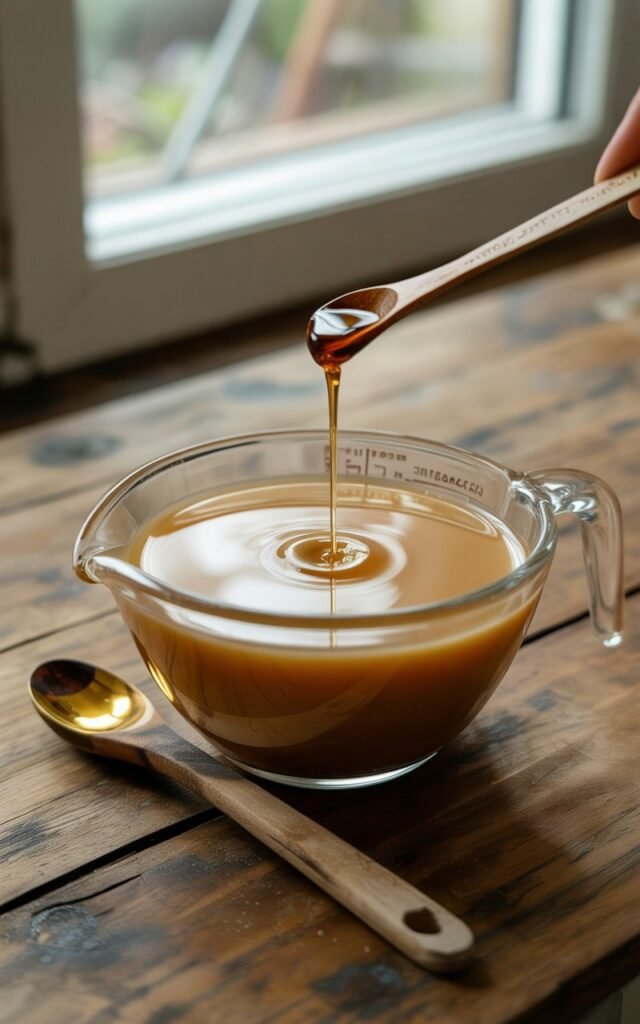
This is the step that makes your candle truly special. Whether you use coffee fragrance oil or finely ground coffee, this is where the cozy aroma begins to develop.
The trick is adding the scent at the right temperature so it fully binds with the wax without fading.
What You’ll Need:
- Melted wax at 170–180°F
- Coffee fragrance oil (or 1–2 tablespoons ground coffee per cup of wax)
- Wooden spoon or stirrer
How to Apply It:
Slowly pour your chosen scent into the melted wax and stir gently but thoroughly for 1–2 minutes. Make sure every drop of wax is evenly infused with the coffee aroma.
If using ground coffee, stir well so the grounds are suspended and don’t clump at the bottom.
Pro Tip:
For a more intense aroma, combine fragrance oil with a small amount of finely ground coffee. The oil gives consistency, while the coffee adds natural richness and texture.
Avoid adding fragrance at too high a temperature — it can evaporate and weaken the scent.
5. Pour the Wax Into Your Container

Now comes the satisfying part: pouring the wax. Doing this carefully ensures your candle sets evenly and looks professional.
What You’ll Need:
- Prepared container with centered wick
- Melted, scented wax
How to Apply It:
Slowly pour the wax into the container, leaving about ½ inch of space at the top. Pour steadily to avoid air bubbles.
If small bubbles appear, gently tap the container or run a toothpick along the surface to release them.
Pro Tip:
Pour in layers if you’re making multiple candles at once or using containers with uneven shapes. Allow each layer to cool slightly before adding the next for a smooth finish.
6. Let the Candle Cool and Set
Patience is key. The wax needs time to solidify properly so your candle burns evenly and smells amazing.
What You’ll Need:
- Your poured candle
- Covered or dust-free area
How to Apply It:
Leave the candle undisturbed for 2–4 hours, depending on the wax type and container size.
Avoid moving it, as shifting the wax can create cracks or uneven surfaces. Covering lightly with a cloth or lid keeps dust out while it cools.
Pro Tip:
If your candle sinks around the wick during cooling, carefully re-pour a small amount of wax to fill the dip. This ensures an even surface and helps the wick burn properly.
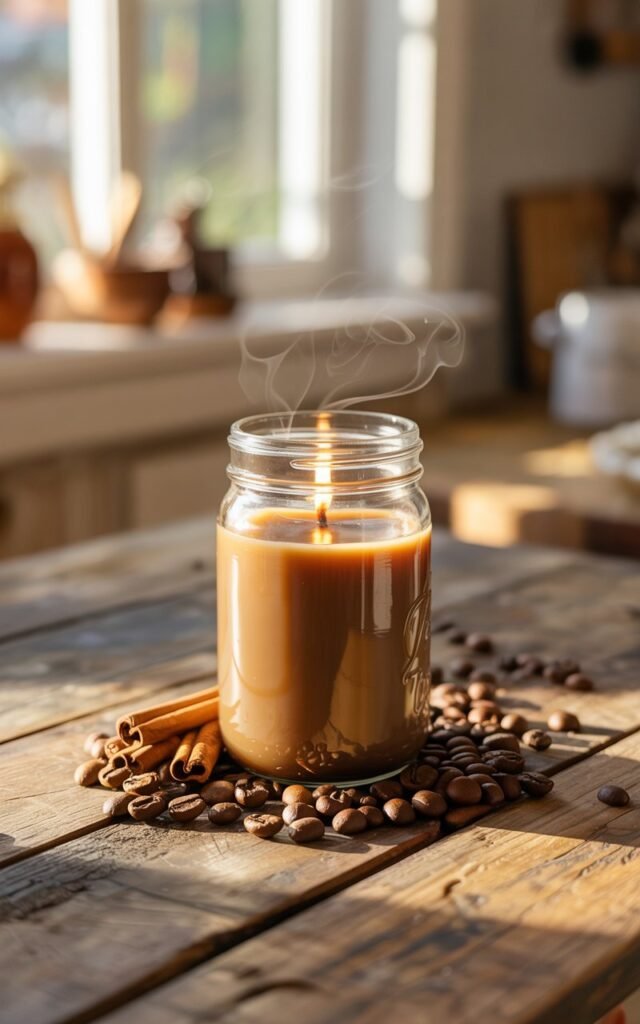
7. Trim the Wick and Final Touches

The finishing touches are what make your candle ready for use or gifting. Proper wick length ensures a clean, controlled burn and prevents smoke.
What You’ll Need:
- Candle with hardened wax
- Scissors
How to Apply It:
Trim the wick to about ¼ inch above the wax surface. This prevents excessive smoke and helps the flame burn evenly. Give the candle a gentle clean with a soft cloth to remove any dust or stray wax pieces.
Pro Tip:
Before the first burn, light the candle for 1–2 hours to create a full melt pool. This step helps the candle burn evenly in future uses and maximizes the coffee scent in your home.
Final Thoughts
Making a coffee scented candle is a fun, rewarding project that brings warmth, aroma, and a personal touch to your space.
With just a few ingredients and simple steps, you can create beautiful candles for yourself or as thoughtful gifts.
By experimenting with different containers, wax types, and scent combinations, you can make each candle truly unique.
Homemade candles are also more natural than many store-bought options, allowing you to enjoy a rich coffee fragrance without unnecessary chemicals.
Once you’ve made one, you’ll find yourself coming back to this easy, relaxing craft again and again.
FAQs
Q1: Can I use real coffee beans instead of fragrance oil?
Yes, adding ground coffee or whole beans enhances the aroma naturally, but it’s less potent than fragrance oil. You can combine both for a stronger scent.
Q2: How long will my coffee candle last?
Burn time depends on wax type and container size. A small soy wax candle usually burns 20–30 hours.
Q3: Can I reuse the container for another candle?
Absolutely! Clean the container thoroughly after the wax has cooled and hardened.
Q4: Can I mix coffee with other scents?
Yes, vanilla, cinnamon, and hazelnut pair beautifully with coffee for a richer aroma.