There’s something so calming about crafting with clay. Maybe it’s the quiet rhythm of shaping something with your hands, or the way time seems to slow down while you create.
For me, that moment usually comes late in the evening when I want to unwind but still do something creative.
That’s how these clay diffuser stones came to life—born out of a mix of curiosity, a little self-care, and my love for subtle home fragrance.
If you’ve ever wanted to fill your space with scent in a soft, natural way—without a plug-in or open flame—these little stones are perfect.
They release essential oils slowly and beautifully, blending craft with calm. And the best part? They look gorgeous sitting on a tray, tucked inside a linen drawer, or styled on a bathroom shelf.
This isn’t just another DIY project; it’s a quiet ritual you can return to again and again.
Below, I’ll walk you through how I make mine—step by step—with personal tips I’ve learned along the way that most tutorials completely skip over.
1. How to Choose the Right Clay Texture

When I first started making diffuser stones, I thought any clay would work. I was wrong. The kind of clay you use determines how well your stones absorb and release essential oils.
If the texture is too smooth, the oils will just sit on the surface and evaporate too quickly.
How to Do It:
Start by choosing air-dry clay that feels slightly porous and soft to the touch. Take a small piece, roll it into a ball, and press your thumb gently on top.
If the surface feels slightly grainy and absorbs moisture evenly, that’s a good sign. Avoid oven-bake or polymer clay—they look great but can’t hold scent properly.
Once you’ve picked your clay, knead it gently for about three to five minutes. I always dampen my hands slightly to prevent cracks and create a smoother finish.
It’s a small step, but it makes your final stones stronger and longer-lasting.
Pro Tip: If your clay feels dry or stiff, wrap it in a damp cloth and let it rest for 10 minutes before working with it again. That softens it up and makes it easier to shape later.
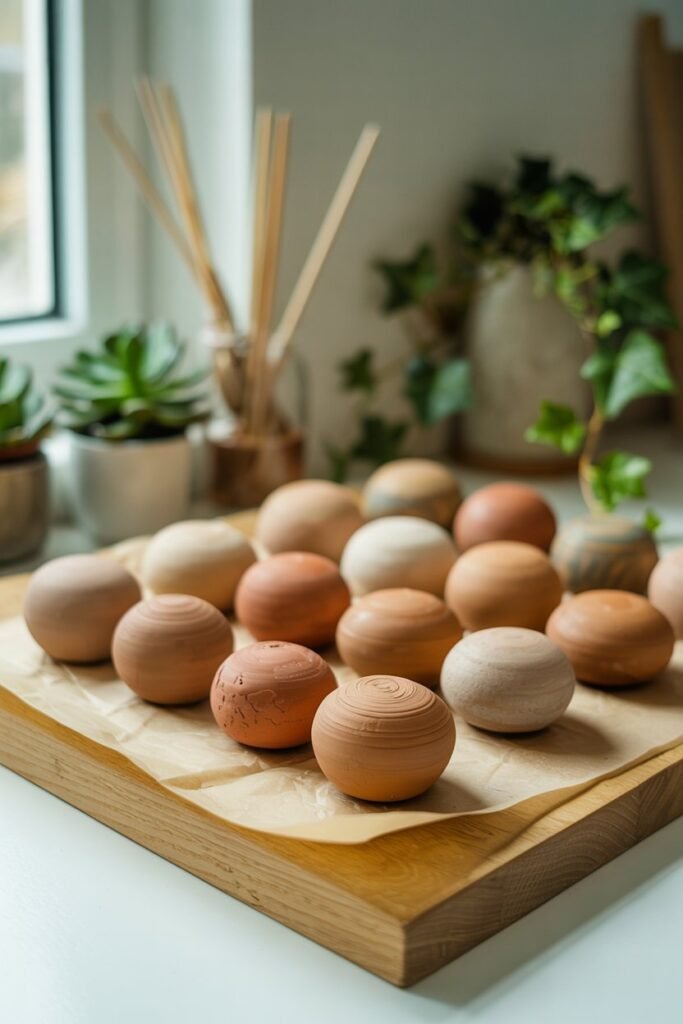
2. How to Shape and Design Your Diffuser Stones
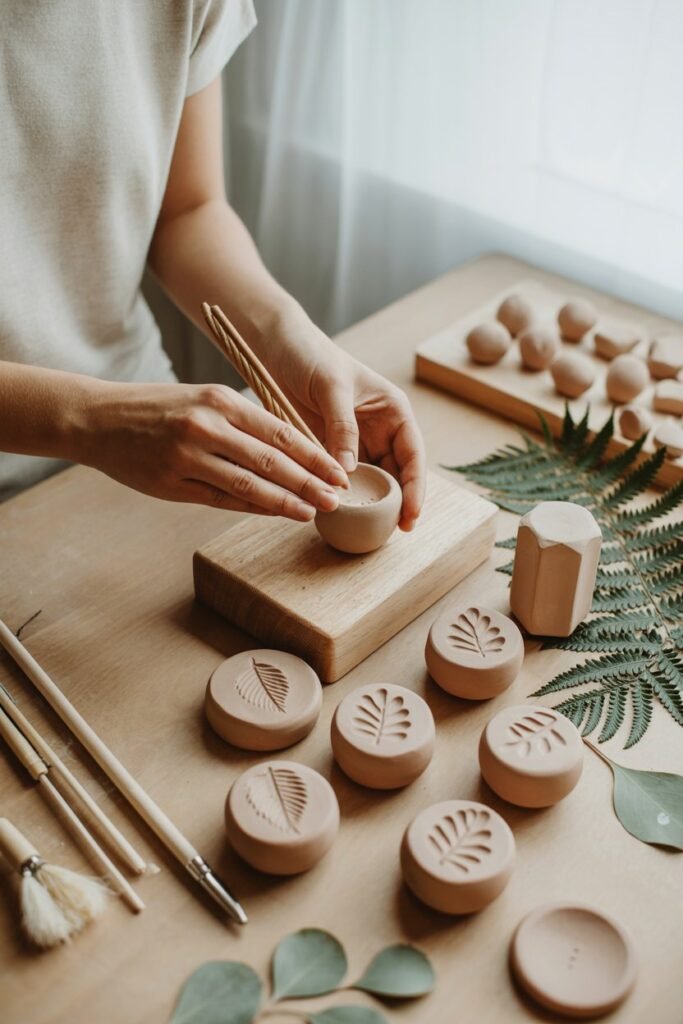
This is where your creativity takes over. I like to think of this part as the “personality” of your diffuser stones—it’s what makes them uniquely yours.
Some of mine look like little beach pebbles, while others resemble soft leaves or abstract sculptures that sit beautifully on a tray.
How to Do It:
Roll out the clay using a rolling pin or a clean glass bottle until it’s about half an inch thick. Too thin and it might crack; too thick and it takes forever to dry.
Use cookie cutters, shells, or even small lace pieces to press patterns onto the clay. You can also shape them by hand—just press, pinch, and smooth until you love the look.
Before leaving them to dry, make a small thumbprint-sized dip in the top of each piece. That shallow dip helps hold essential oils when you’re ready to use them later.
Pro Tip: Try experimenting with organic shapes rather than perfect circles or squares. They look more natural and pair beautifully with earthy decor styles like boho or minimalist interiors.
3. How to Dry and Set the Clay Naturally
This is the part that really tests your patience, but it’s worth it. Rushing this process can lead to cracks or stones that don’t absorb evenly.
I’ve tried heat lamps, ovens, and even placing them near windows—but nothing beats slow, natural drying.
How to Do It:
Lay your shaped stones on parchment paper in a cool, dry area. Let them sit undisturbed for at least 48 hours. Flip them halfway through so both sides dry evenly.
If you live somewhere humid, place them in a shaded spot rather than near direct sunlight—it prevents surface drying while the inside is still soft.
Once fully dry, you can gently sand the edges with fine-grit sandpaper to smooth them out.
This not only makes them look more polished but also helps the essential oils soak in more evenly.
Pro Tip: If you’re unsure whether they’re completely dry, tap one lightly on a countertop. A crisp, hollow sound means they’re ready to use.
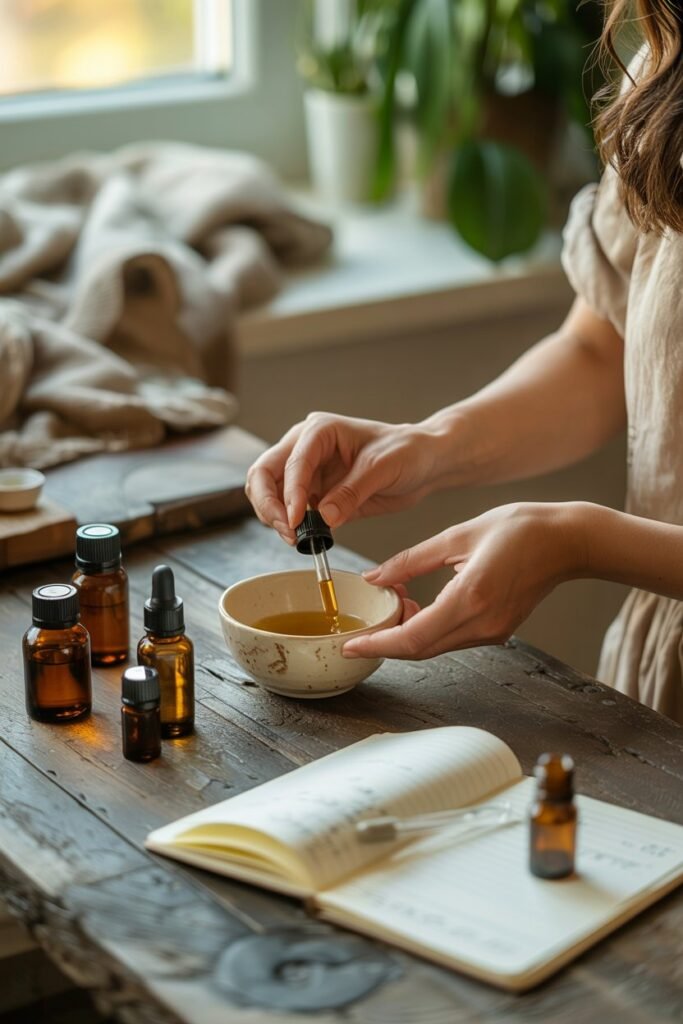
4. How to Infuse Your Stones with Essential Oils

This is the part that transforms your project from simple decor to a functional, aromatic piece.
The key here is patience—too much oil at once, and it’ll just sit on top rather than soak in.
How to Do It:
Once your stones are completely dry, place them on a clean plate or tray. Add 3–5 drops of essential oil directly onto each stone. The clay will absorb the oil slowly, releasing the scent over several days.
You can use one scent for all your stones, or mix and match to create different moods around your home.
For a calming nighttime blend, I like to mix lavender, cedarwood, and a hint of chamomile. For mornings, a few drops of eucalyptus and sweet orange wake up the room beautifully.
Let the stones sit for at least an hour before placing them on display. This allows the oil to settle in, preventing any staining on your furniture.
Pro Tip: Always use pure essential oils—synthetic fragrances tend to fade faster and don’t have the same therapeutic effect.
5. How to Blend Scents Like a Pro
Here’s where you can make your diffuser stones truly your own. Think of scent blending as painting with aroma. You’re creating a mood, not just a smell.
How to Do It:
Choose a base note, middle note, and top note—that’s the classic perfume structure. For instance:
- Base: Sandalwood or vetiver (long-lasting and grounding)
- Middle: Rose or geranium (soft floral balance)
- Top: Lemon or peppermint (bright and refreshing)
Start with two drops of your base oil, add one of your middle, and finish with one or two of your top. Mix them in a small bowl first, then apply the blend to your stones. The scent will evolve as it diffuses, changing slightly throughout the day.
Pro Tip: Keep a small notebook of your blends—you’ll thank yourself when you want to recreate that perfect combination later.
6. How to Display Your Clay Diffuser Stones
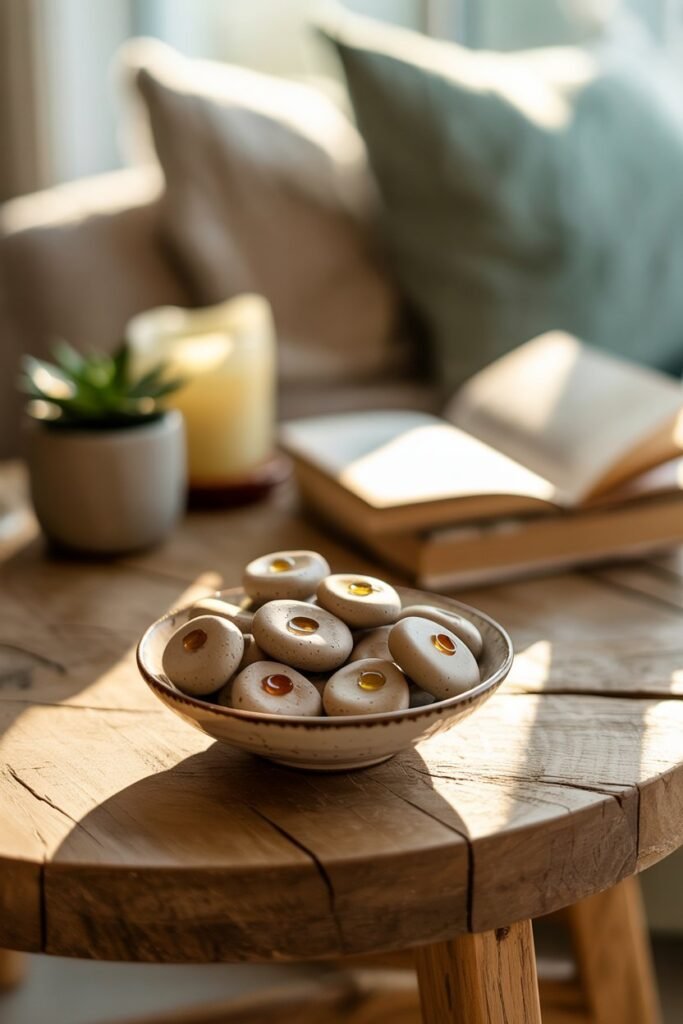
Your diffuser stones aren’t just functional—they’re decorative accents that can enhance your space. I like to think of them as a blend between art and atmosphere.
How to Do It:
Gather a few stones and place them in small ceramic dishes, glass jars, or on marble trays. I often scatter a few in my entryway to welcome guests with a soft, clean scent.
You can also tuck them inside linen closets, drawers, or near your workspace for subtle aromatherapy.
If you prefer a cohesive look, stick to neutral tones and organic shapes.
For something more playful, paint half of each stone with mineral-based pigments or natural clay stains before applying the oils—it gives them a modern two-tone design without sealing the surface.
Pro Tip: Never coat your stones with varnish or glaze. It seals the pores and blocks the oil absorption completely.
7. How to Refresh and Reuse Your Diffuser Stones
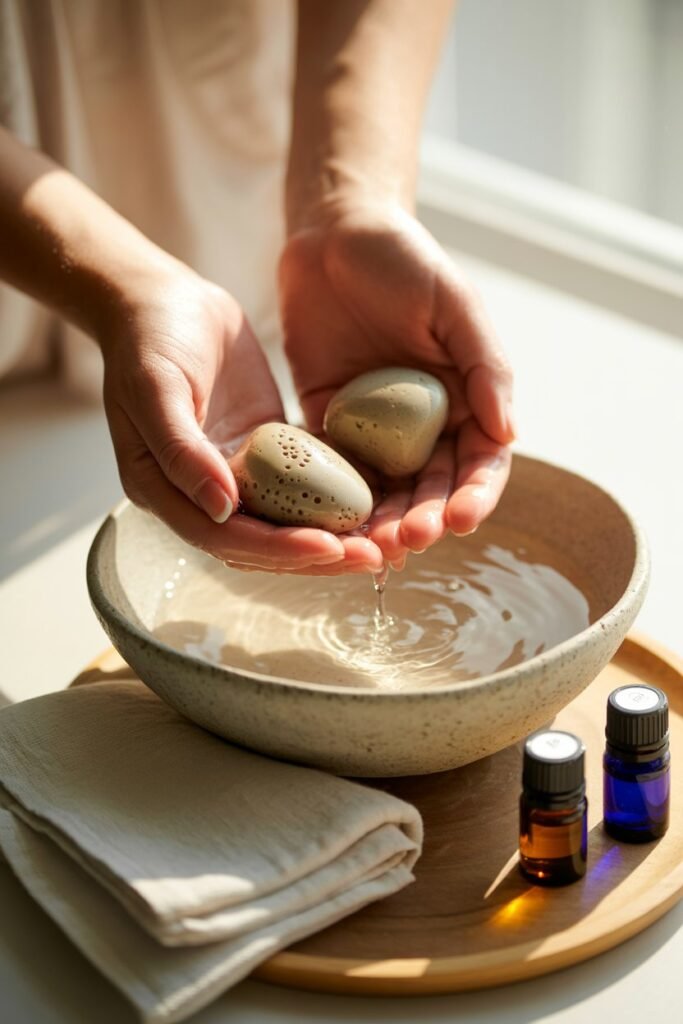
One of the things I love most about these stones is how sustainable they are. You don’t need to toss them out when the scent fades—you simply recharge them.
How to Do It:
Every few days (or when the aroma weakens), rinse each stone gently with warm water and let it dry completely. Once dry, apply a few new drops of essential oil.
Over time, you’ll notice the scent becomes richer and more balanced because the clay holds tiny traces of each blend from before.
If you ever want to switch scents entirely, soak the stones in warm water mixed with a teaspoon of baking soda for an hour. Rinse, air-dry, and they’re ready for a brand-new fragrance.
Pro Tip: Rotate your scents seasonally—use minty or citrus oils in summer, and cozy spice blends in winter to keep your home feeling fresh year-round.
8. How to Store and Gift Your Diffuser Stones

These stones make thoughtful, handmade gifts that feel personal without being complicated. They’re also easy to store and maintain.
How to Do It:
Keep unused stones in an airtight glass jar or a linen pouch to protect them from dust and moisture.
When gifting, I like to wrap three or four stones in parchment paper, tie them with twine, and include a small dropper bottle of essential oil on the side.
It’s simple but feels intentional—like a small piece of calm wrapped up for someone else.
You can also personalize the packaging by stamping names or using dried herbs in the wrapping. It’s a beautiful touch that feels homemade yet elevated.
Pro Tip: If storing for long periods, make sure the stones are completely dry to prevent mold growth.
Final Thoughts
Making these DIY clay diffuser stones has become one of those quiet weekend rituals that help me reset.
There’s something grounding about shaping clay with your hands and then scenting it with oils that match your mood.
Each time I refresh mine, I’m reminded that small, handmade touches often bring the most comfort to a home.
What makes this project special is how flexible it is—you can adjust the scent, design, and even the display to fit your personal style.
Whether you place them beside your bed, in your entryway, or on a bathroom shelf, they add both beauty and a sense of calm to your space.
And once you’ve made a few, you’ll probably never want to buy another store-bought air freshener again.
If you’ve been craving a creative project that’s simple, therapeutic, and genuinely useful, this one might just become your new favorite ritual.
FAQ
1. How long do clay diffuser stones hold their scent?
Usually between three to seven days, depending on the oil type and room humidity. You can refresh them anytime by adding a few new drops of essential oil.
2. Can I color the clay before it dries?
Yes, but stick to natural pigments or powdered clay tints. Avoid acrylic paint, as it can block the clay’s pores and stop scent absorption.
3. What’s the best essential oil blend for relaxation?
Try combining lavender, sandalwood, and bergamot for a calm, spa-like aroma that lasts beautifully on clay.
4. How should I clean the stones before switching scents?
Soak them in warm water with baking soda for about an hour, rinse gently, and air-dry before adding new oils.
5. Can I use these in the shower or near water?
It’s best to keep them dry. While a humid room is fine, direct moisture can weaken the clay over time.